
Welcome back, magical unicorn teachers! I’m back again with another post on OutSchool! This time I’m sharing the details of how I created and executed my first OutSchool class. I’ve gotten a lot of questions about the process and how I figured out the technology to make the class work, because this is new territory for a lot of us online teachers who have been rolling out of bed and teaching the curriculum that was handed to us. I want to help you take the fear out of the equation!
Also, I’d like to mention that I did not do this alone. I had a lot of support from some amazing teacher besties who helped me brainstorm for a month, were incredibly patient as I procrastinated anxiously, and gave suggestions as to how I could figure out the technological aspects of it. So my first tip would be highly recommending getting you a teacher bestie! If you need one, I’m happy to help! But for now, let me share my thought process through putting together my first OutSchool class!
What Should I Teach?
This is where I got stuck first (that definitely didn’t take long!). All the years I taught in the early childhood classroom, I complained that I wanted more freedom to use my creativity. Well, now the possibilities were practically endless and I had no idea where to start. Luckily, OutSchool helps you with this! They send out an email every Sunday with hundreds of parent requests for classes. This definitely helped with the whole “shot in the dark” feeling.
I was also torn on what direction to take with this. I taught preschool for seven years, I’ve taught ESL online for three, so at first, I thought I’d go in one of those directions. But they just weren’t inspiring or motivating me to push forward with this.
Then I saw on the list of requests that someone wanted a class on drawing bubble letters. And if you know me at all by now, you know drawing, art, and crafts are my love language! So I drew up a sample for the class preview photo and gave it a chance! The class request was specifically for writing students’ names in bubble letters, so that is what I specified in my class description. I added in some fun extras in case we had extra time in class. I also created a printable to include so the students could practice on their own! It’s in my Teachers Pay Teachers store in case anyone wanted to use it for their kids at home.
Who Should I Teach?
I always loved little kids. For the longest time, I felt like that was all I could teach, because I couldn’t be enough of a disciplinarian enough with older kids and I just wanted to be more of their friend. Teaching ESL for VIPKID the last three years has changed that! I’ve taught all ages from three to fifteen for VIPKID and I’ve learned how to work with and appreciate all of them!
I felt like bubble letters were simple enough to teach that I could easily adapt the class to younger learners and add some extras for more advanced, older learners, so I chose a wide age range of seven to twelve years old. I’ve been used to teaching one student at a time, so I kept the class number smaller and limited it to six enrolled students. I kept the class at 30 minutes because I felt this worked well with attention spans and it both allowed for extension if the lesson went quickly, but it also gave me ample time to practice letters for each student and talk to them.
How Should I Teach?
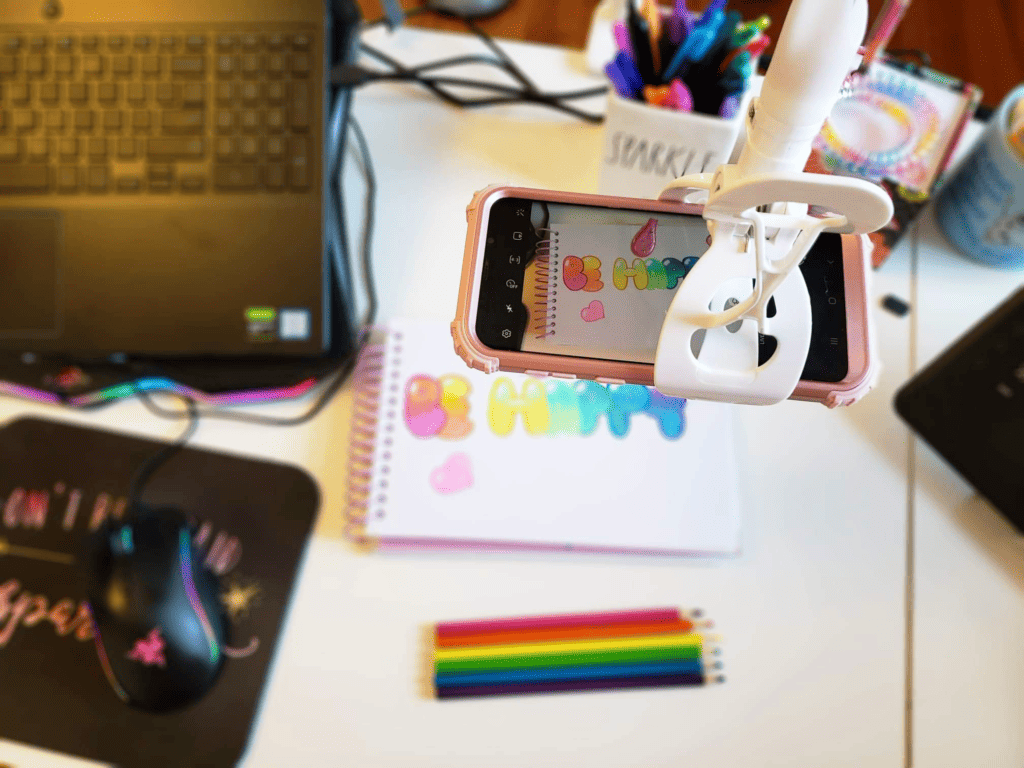
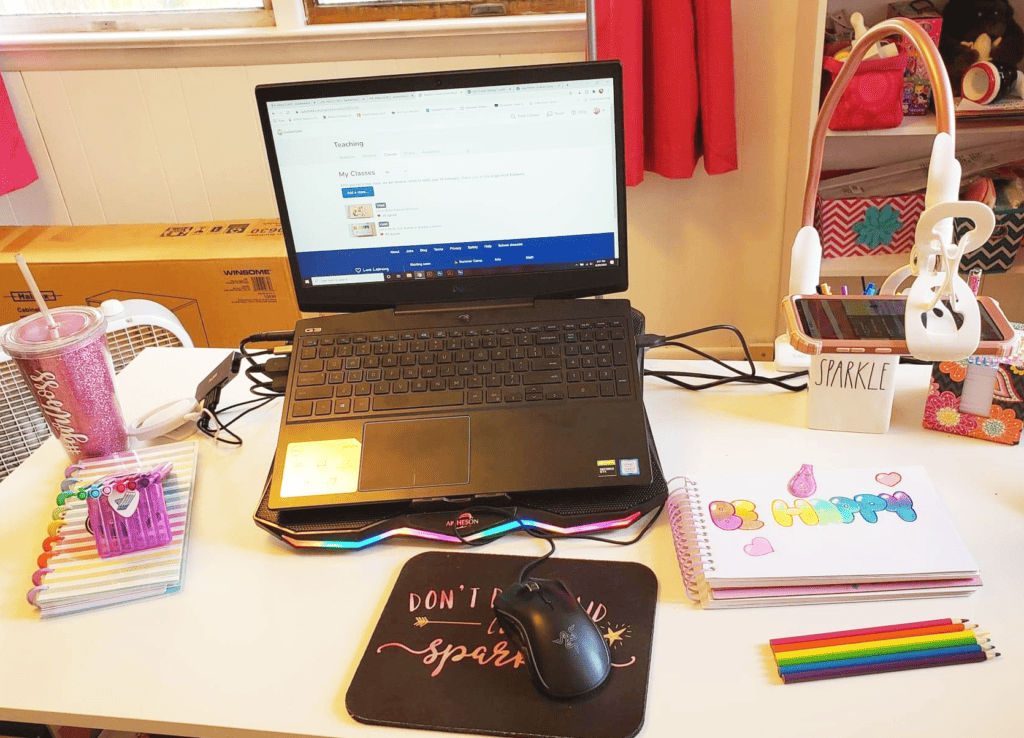
This was another detail that kept me procrastinating just a bit! OutSchool classes are held over the Zoom app, so how was i going to make it so I could draw and the students could see it clearly and follow along? I will tell you how I rigged up my setup. I’m sure there are other ways of doing it but this is working for me!
I found out that you can log into Zoom from two devices. Essentially, I could use my laptop webcam so the students could see me, and then I could use my phone as a second camera angled toward my desk, where I would be drawing. I found this amazing, super sturdy gooseneck tripod on Amazon which made this whole thing possible! I will add it to my Amazon Favorites store and also link it here with my affiliate link, for anyone else trying to teach classes like this! I’ve had quite a few friends buy it too and we all swear by it!
So I was technically logged into Zoom twice, on my computer, which used my webcam so the students could see me, and my phone on the gooseneck tripod, so they could see my hand drawing on the paper. If you do this, two things you need to do are (1) disconnect audio from your phone in Zoom, or you will echo, and (2) right click the video from your phone on the computer screen and click “Spotlight video”. This will lock that video into the largest space on the screen, so all the students will be able to see it, despite their own Zoom viewing preferences. One more thing that might help is to lock your phone into portrait or landscape mode, whichever works best for what you’re showing on screen!
Why Should I Teach This Topic?
My first answer to this question, besides, “because it was on the list of requests” was, “I don’t know!”. In fact, I didn’t have an answer until I’d taught it a few times and got to talk to a few students who were really excited to learn about it! I started to talk about art projects or things like they could use this skill for, like making gifts for friends and family, making signs for their room, or just doodling in their sketchbooks! It is always a great idea to help the students figure out how they can use the skill you’re teaching in their own lives!
What I Learned From Teaching Bubble Letters
First, I am SO grateful that I taught for VIPKID for three years before discovering this. I was so quiet and introverted before VIPKID! I have since learned to be conversational and adaptive to any kind of student that I have. This was an extremely helpful skill! I had one class where all six kids were super excited to tell me about their pets, their families, their favorite foods, and their life story (I was seriously impressed that they managed to connect all these things to the topic of bubble letters). In another class where I said hello, the kids said hello back, and all quickly muted themselves. I could immediately tell that they wanted to draw and not talk, so I took over and ran the show! It is so important to be able to switch gears in an online classroom.
Second, something I had to “unlearn” from VIPKID was “running the show”. I do not have to put on a circus act in these classes. I showed the students some techniques and they ran with them. The class is about them creating something, not me showing them what I can do. This is probably more of a life lesson now that I think about it, but it felt really good to let go of that pressure.
I Did It!
And that is how my first few classes teaching drawing on OutSchool went! I hope this helps you feel better about your first upcoming class, or gives you some inspiration for future classes! Let me know how you handled your first class! Comment here or message me on Instagram!
Are you still thinking about applying to OutSchool? Let me help you! Use my referral code and message me on Instagram to let me know you’re applying! I can answer all your questions and help you get started teaching! Thanks so much for coming back! See you soon!